Chip Carving Lap Desk - Overview
Chip Carving Lap Desk - Overview
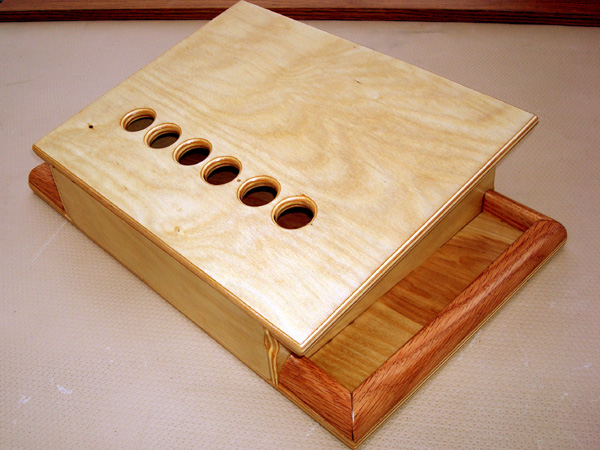
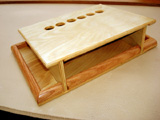
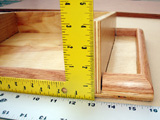
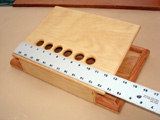
DESCRIPTION: I sized this desk to sit comfortably on your lap and provide
a nice work surface. The base is 16" wide by 10" deep, and the
top is 13" wide by 10" deep. Your work piece is raised up and
angled toward you, making it easier for you to see the small details as
you carve. The holes in the top allow you to push the chips into the inner
cavity. To dispose of the chips, just tip the desk toward the back. There
are two small areas at either side to hold items such as a brush, another
knife, pencil, eraser, etc.
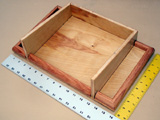
CONSTRUCTION: Details about the various parts are given on the other pages.
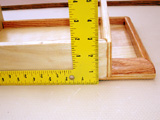
To obtain a good fit for all the plywood parts, I suggest that you cut
all grooves at the same time, 3/16" deep with a 31/64" plywood bit.
ROUNDED EDGES - Sharp edges on the plywood pieces may not feel all that
great on your hands. I used a 1/4" round-over bit on all edges as appropriate,
including the holes. Be careful to not round over the plywood edges that
fit into the grooves.
FIT: After the plywood parts are completed, dry assemble the box to make
sure that everything is square. If you had cut the grooves carefully (I
used a router table), all the pieces should fit squarely to one another.
Since the dimensions are somewhat flexible, you can make adjustments until
everything fits. When all the pieces are cut to fit, sand to 220 grit
paper.
ASSEMBLY: With tight and properly aligned grooves, glue is all that is
needed. 1. Apply glue to the mating surfaces of the two sides and the
front. Dry assemble all the plywood parts and clamp the glued surfaces.
2. Apply glue to the three grooves in the base and the bottom of the previously
glued pieces. Add the top without glue, and clamp as needed. 3. Glue and
clamp the top to the sides and front piece. 4. Cut and glue the seven
pieces of molding to the base, fitting each joint as you go.
FINISH - I used a two coats of a brush-on satin polyurethane finish.
| Overview | Material List | Construction of the base | ||
 |
 |
 |
||
| Dimensions - front | Dimensions - sides | Dimensions - top | ||
 |
 |
 |